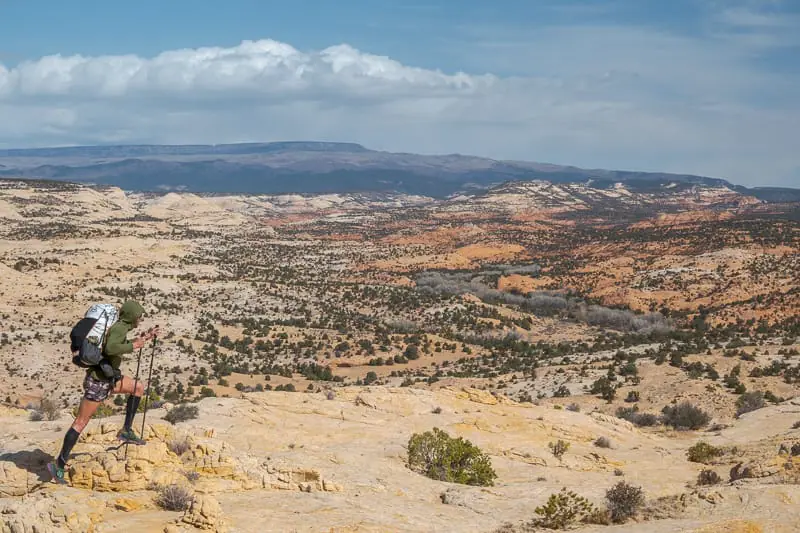
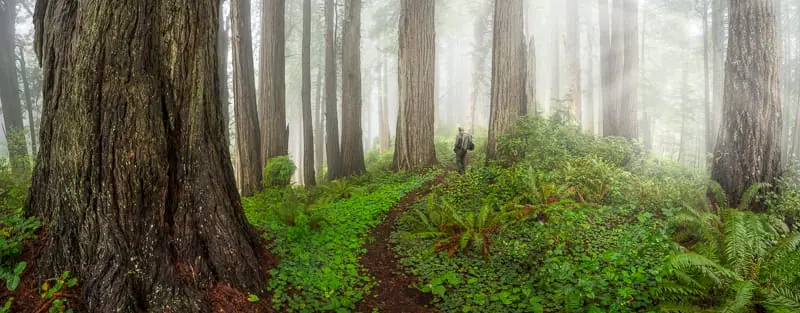
 This page distills all my backpacking knowledge & favorite gear from 22,000 miles of ultralight hiking.
These aren’t standard guides & videos; they are in-depth, step-by-step systems, battle-tested in the wild.
If you want to master ultralight hiking & outdoor skills, this page has it all.
Take your hiking trips to the next level & learn landscape photography too!
Table of Contents
- My Ultralight Hiking Gear List
- Big Mistakes to Avoid
- Sleep System: Shelter, Quilt & Pad
- Camp Routines
- Backpacks
- How to Pack a Backpack
- Layering System Basics
- Trail Clothes
- Camp Clothes
- Food & Supplements
- Cooking & Cold Soaking
- Hydration System
- Small Essential Gear
- First Aid & Emergency
- Maps & Navigation
- Toilet Kit
- Bear Proof Food Storage
- Snow Hiking Gear
- How to 10X Your Learning Speed
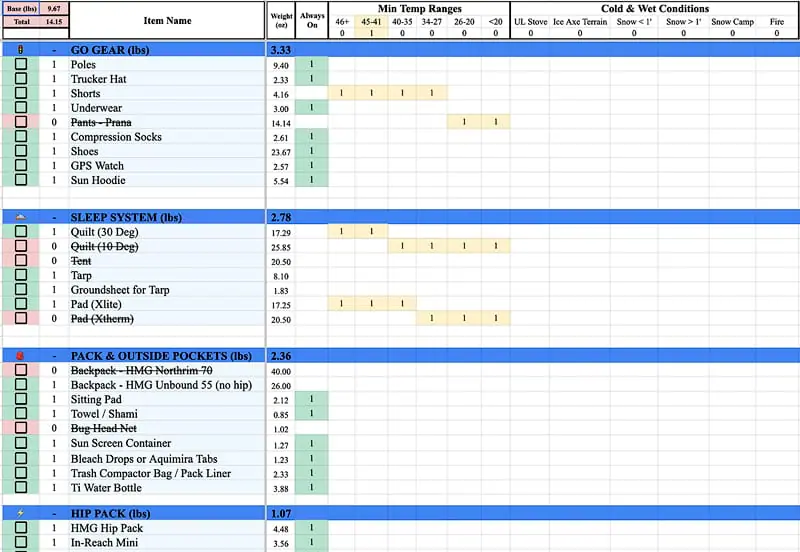
My Ultralight Hiking Gear List
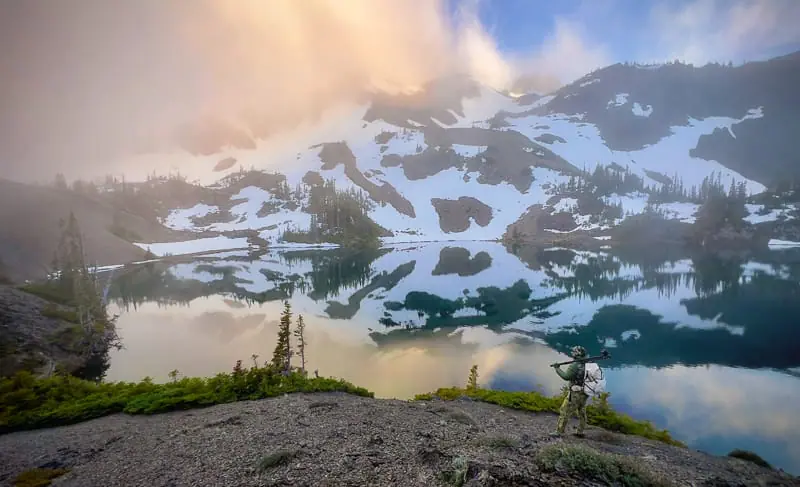
This video covers my current ultralight hiking gear.
My complete gear list with links to each piece of equipment is included in the different sections on this page.
Big Mistakes to Avoid
Most backpackers make 3 big mistakes & spend their trips tired or miserable.
These mistakes are:
- Heavy backpack from too much useless gear
- Decision fatigue from too much useless gear
- Too tired to enjoy hiking, from items noted above
I made all of these mistakes, but 22,000+ miles on the trail provided some better alternatives.
Let’s start with all the stuff you don’t need.
This will ensure you don’t waste money and carry extra weight.
Backpacking Gear You Don’t Need
Soap: Wash with water. Soap is bad for the rivers. Hand sanitizer after bathroom.
Extra Clothes: Only two sets of clothes, no duplicates.
- Trail clothes
- Camp clothes
Deodorant: Wash daily & do without it
Carabiners: Only for technical mountain climbing.
Camp Towels: Heavy! This light 13″ X 17 ” swimming towel and your body heat is all you need.
Boots: Trail runners are light, dry rapidly, and protect your feet from getting sore on long trail days.
Bug Repellant (Poison): Under high bug pressure nothing works, instead:
- Camp in windy locations.
- Stay on the trail until it cools down.
- Use a Bug head net
Music Speaker: Wear headphones.
Hydration Bladders: Heavy & bulky! Water bottle on trail. Water bags at camp.

Camp Chairs: Sit cross-legged on the ground with foam pad.
Cooking Pots, Pans & Plates: Heavy! Cook, eat, and drink with a titanium pot and small burner.
Carrying Too Much Water: Instead of over-carrying, make calculated, map-based decisions on exactly when and where to fill up.
Unused Gear Outside Pack: Only daily “trail use” equipment should be stored outside of the backpack.
It also looks sloppy, but I’m OCD about this stuff:)
Let’s get into the backpacking gear checklist…
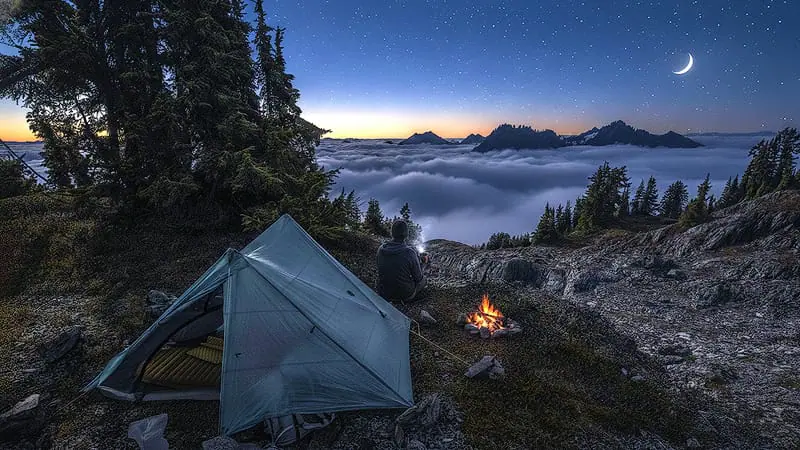
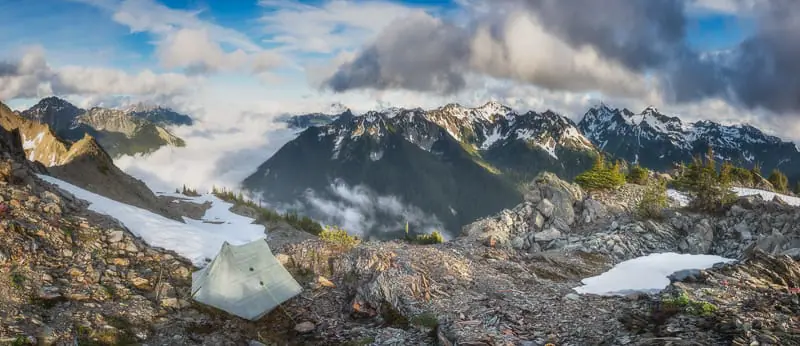
Sleep System: Shelter, Quilt & Pad
Most hikers obsess over base weight while ignoring the heavy physical cost of fatigue.
Maximizing recovery is the ultimate secret to enjoying high-mileage days.
I’m going to show you why carrying a few extra calculated ounces is the smartest investment you will ever make for hiking performance.
The following sections go in-depth on selection philosophy for each piece of my sleep system:
Tent: Zpacks Pivot Duo | Stakes (8) | Poles
Tarp: Zpacks 8.5′ X 10′ | Ground Sheet | Stakes (8)| Poles
Quilts: Warm Weather (30F/950FP) | Cold Weather (10F/950FP)
Pads: Warm Weather | Cold Weather
Sleep Gear: Pillow | Ear Plugs | Mouth Tape
Supplements: Magnesium | L-Theanine
Tent System
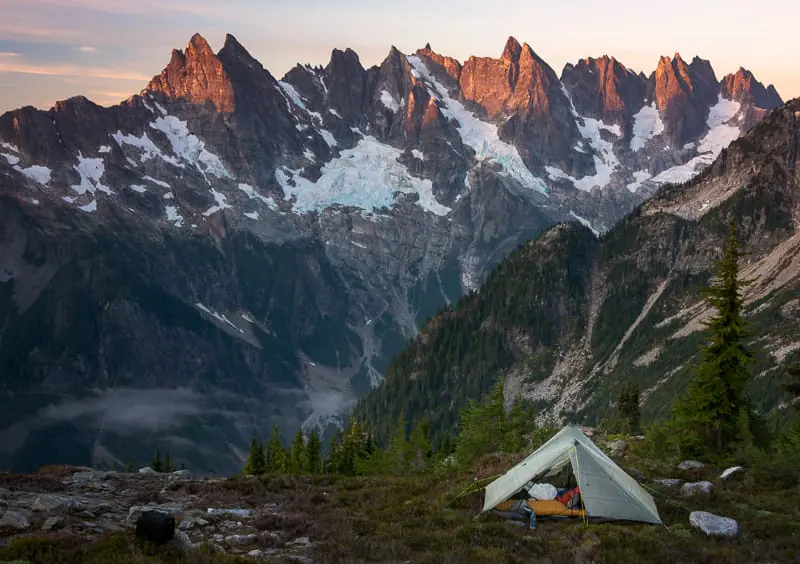
My Tent: Zpacks Pivot Duo | Stakes (8) | Poles
Pros
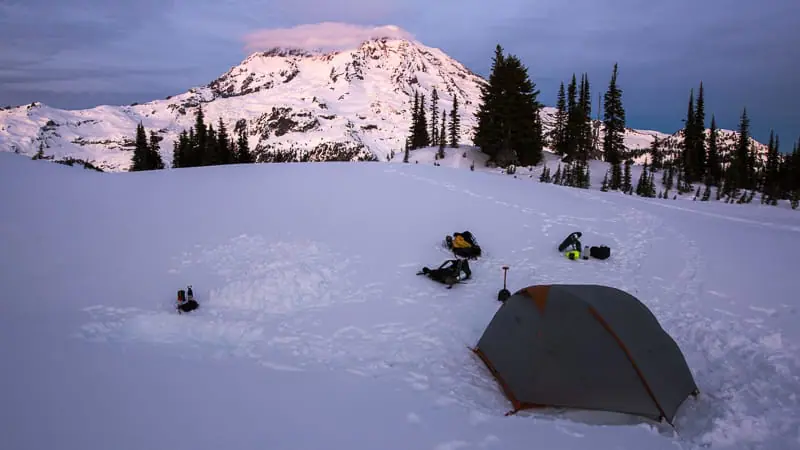
- The Thermal Advantage: Holds heat exponentially better than a tarp; interior temps stay 8–10°F warmer than outside air, completely blocking freezing drafts.
- Living Space: The 2-person footprint easily swallows a 6’2″ hiker and an entire camera kit during multi-day storms.
- Dynamic Pitching: Drop it flush to anchor against 60 mph winds, or loft it high to max out airflow and crush condensation.
- Better Psychological Recovery vs Tarp: Provides absolute storm protection, tight-space adaptability, and massive psychological recovery when bug pressure or freezing mountain storms hit.
Cons
- Heavier than tarp
- More Expensive than tarp
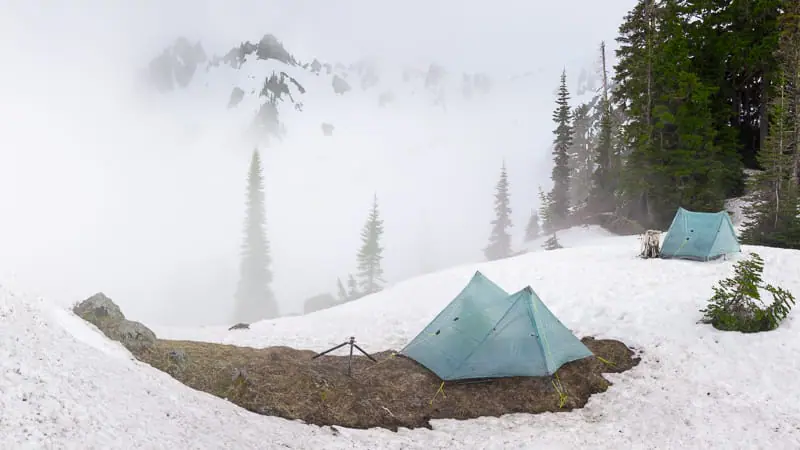
- Fail Point: 100% unusable in deep snow where you can’t access hard ground; non-freestanding designs cannot anchor safely.
Tarp System
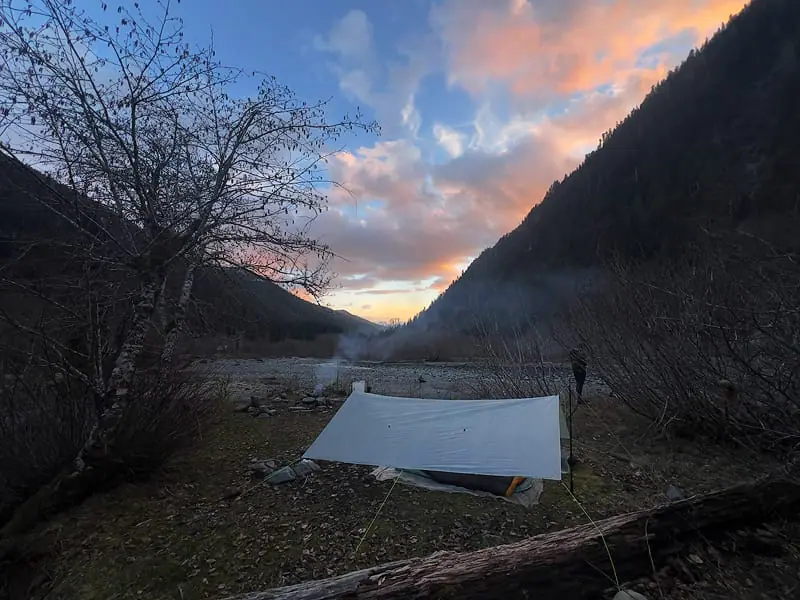
My Tarp: Zpacks 8.5′ X 10′ | Ground Sheet | Stakes (8)| Poles
Pros
- True Ultralight: The absolute peak of ultralight efficiency at 7 oz. Primary choice from February to June before summer bugs hatch.
- Modular Pitching: Adapts instantly via trekking poles into a Full A-Frame for total wind/rain blocking, or a Half A-Frame lean-to configuration.
- The Cowboy Camp Feel: Half A-Frame creates a fast, slanted roof with wide-open panoramic views and wind protection.
- The Ground Sheet Rule: Skip heavy, expensive Dyneema ground sheets; polycryo offers better weight savings.
Cons
- Zero Bug Protection: Always use tent during bug season.
- Colder: Holds only 2–3°F of ambient body heat; cold, moving mountain air will sneak under the edges during heavy storms.
- Fail Point: 100% unusable in deep snow where you can’t access hard ground; non-freestanding designs cannot anchor safely.
Sleeping Quilts
My Quilts: Warm Weather (30F/950FP) | Cold Weather (10F/950FP)
Sleeping quilts are exponentially superior to sleeping bags. Here’s why:
Pros of Sleeping Quilts
- Warmer: Pack significantly more warmth per ounce by eliminating unnecessary fabric & zippers which can fail.
- Temperature Versatility: Easily drape loosely in warm weather or seal tight on freezing nights.
- Dual-Use Camp Gear: Doubles as a standalone blanket to insulate your shoulders or legs while relaxing outside the tent, saving weight on extra camp layers.
Cons of Sleeping Bags
- Insulation Failure: Your body weight crushes the bottom half flat removing insulation loft.
- Dead Pack Weight: Forces you to haul heavy, compressed material that provides zero warmth.
- Rigidly Overheating: Locks you into a restrictive zip-up tube with no way to modulate air flow.
- Zipper Risk: If the zipper fails in cold weather, you’re in big trouble.
Warm Weather Quilt: Lows > 40F
30F Down Quilt (950 Fill): This is my summer quilt for all ecosystems
It’s very light, but doesn’t hold up to the huge mountain weather temp drops that come with spring and fall storms.
It’s much lighter than the cold weather quilt & takes up hardly any room inside a pack.
Cold Weather Quilt: Lows < 40F
10F Down Quilt (950 Fill): This quilt covers me for lows of 40F – 0F for all ecosystems.
It’s my go to for mountain & canyon trips in spring, fall and winter.
I layer down pants and coats at night for lower temps.
When it’s between 30-40F I use the quilt hanging out at camp instead of bringing extra worn layers.
This saves weight.
Sleeping Pads
My Pads: Warm Weather Pad | Cold Weather Pad
Only 3 metrics matter for ultralight sleeping pads:
- Comfort
- Insulation (R-Value)
- Weight
Full-length, inflatable pads offer the perfect mathematical tradeoff between all three.
Sacrificing comfort to save a few ounces—whether by packing a brutal foam pad or a short, stubby inflatable—destroys sleep quality, spikes calorie burn, and ruins on-trail recovery.
Achieving the highest possible R-value per ounce requires matching your pad strictly to your environment.
Warm Weather Pad: Lows > 35F
Warm Weather Sleeping Pad: R-Value=4.5
Regular/wide size for me at 6″2, 175 lbs
You could run this pad in way lower temps, but it actually saves weight to carry less layers, and switch to a warmer pad when temps hit 35F for the lows on the coldest night of the trip.
Cold Weather Pad: Lows < 35F
Cold Weather Sleeping Pad: R-Value=7.3
If you just want to buy one pad, go with this one.
It’s very warm but also works great in summer. You’ll just need to carry less sleep layers in warm weather.
You can run this thing on snow as well & stay very warm.
Sleep Gear & Supplements
Pillow: Great way to improve sleep for 3 extra ounces of weight
Ear Plugs: Worn every night
Mouth Tape (Plastic Free): Just take enough for the trip.
Nose breathing improves nitric oxide production.
Air tape out for 3 days upon arrival. It has slight smell that goes away. Biodegradable.
Sleep Supplements
Magnesium: I prefer 400mg arriving at camp and another 400mg right before bed
L-Theanine: I prefer 200mg arriving at camp and 200mg right before bed
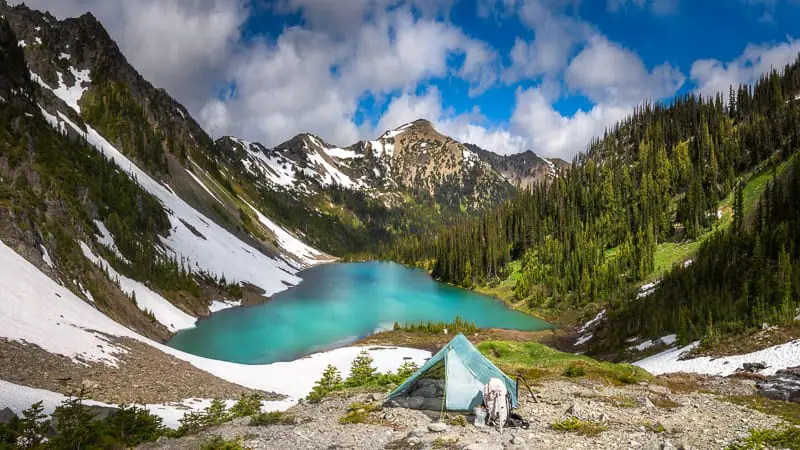
Camp Routines
Camp Site Selection Checklist
Match the site to your specific tent footprint: Look for “Long and Skinny” vs. “Square” Spots: A Zpacks tent often needs a long, skinny spot, whereas a tent like the Big Agnes Copper Spur needs a more square area.
Test Drive the Ground: Don’t just look at it; lay down on the bare ground before setting up. This ensures the spot is actually flat and identifies any hidden lumps before you pitch.
Clear the Debris: Manually clear out sticks and small rocks. This prevents punctures and ensures your tent floor lasts much longer.
Check for Widow-Makers: Always look up. Scan the immediate area for standing dead trees or large dead branches that could fall in a windstorm.
Avoid Deep Valley Floors and Hollows: Cold air collects in low areas, making them significantly chillier and more humid than a spot slightly higher up the slope.
Distance from Water (200 Feet): To reduce condensation and avoid swarms of bugs, camp at least 200 feet away from lakes or streams.
Identify Natural Windbreaks: Look for large rocks, bushes, or healthy trees to act as a leeward shield against prevailing winds.
Avoid Drainage Paths: Look for signs of water flow like gullies or depressions where water might pool during a heavy rainstorm.
Capture the Morning Sun: Point the head of your tent toward the east. Catching the first rays of sun helps dry out morning dew and nudges you out of the sack for early shoots.
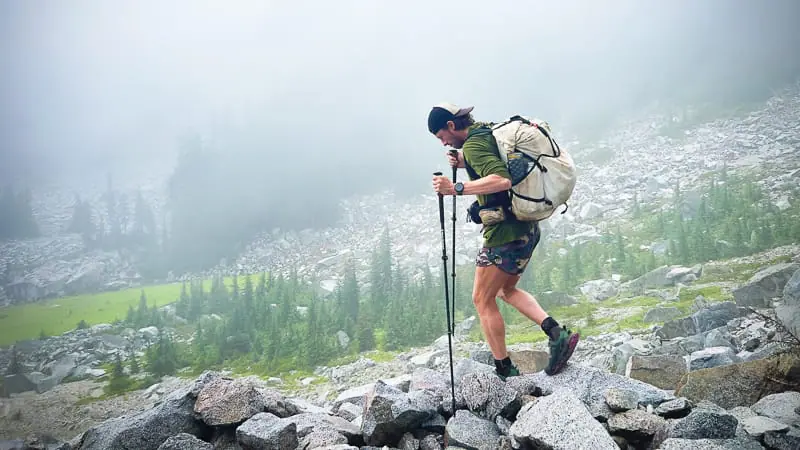
Backpacks
My Backpacks: Unbound 55L Pack or Northrim 70L Pack | Fanny Pack | Pack Liner
Below, I’ll discuss why I choose these packs & their specific applications.
First, it’s essential to understand why I’ve only used Hyperlite Mountain Gear Backpacks since 2015.
Pros of Hyperlite Mountain Gear Backpacks
- Comfort: Shapes to contours of back. Simple 2 shoulder strap system doesn’t require constant adjustments.
- Simplicity: Eliminates zippers, extra straps, clips, and clunky “load balancing” systems that don’t work.
- Ultralight: 1-2 lbs max
- 100% Waterproof: Non-porous Dyneema. Doesn’t absorb water.
- Durability: Handles off-trail abuse without puncturing or tearing.
- Packing Efficiency: Streamlined roll-top design with one large main compartment, and large stretchy outside pocket volume for trail gear. No extra pockets for gear to get lost.
Cons of Big Name Brand Backpacks
Brands: REI, Deuter, Osprey, Gregory, Arc’teryx, North Face, Kelty, Etc
After you have been hiking for a while it’s easy to tell these packs were designed in a board room & not engineered on the trail.
- Water Absorption Trap: Cheap porous fabrics readily soak up rainwater & sweat, adding extra weight.
- Design Complexity: Too many weight adding “features” that decrease packing & trail efficiency.
- Heavy & Bulky: Cloth and nylon adds unnecessary base weight
- Failure Points: Reliance on zippers means your primary access points will jam & fail in dirty environments.
- Fragmented Gear Management: Scattering small essentials across complex small zipper pockets forces constant, energy-wasting pack dumps to find gear.
Main Pack: Sub 10 Day Trips w/ UL Camera
Ultralight Camera System (Nikon Z30)
My favorite pack of all time.
Removing the hip belt on the Unbound allows your legs & hips to rotate naturally.
This makes for a much more enjoyable hiking experience.
Fanny pack is great for holding phone, gloves, electrolytes, and snacks for eating on the move.
Big Pack: Pack Rafting, Winter, or Full Frame Camera
This is my go to for pack rafting trips, winter trips, or shorter hikes with my full frame camera.
This pack has a hip belt.
I leave it unstrapped allowing for a natural gait and better hiking experience.
Fanny pack is great for holding phone, gloves, electrolytes, and snacks for eating on the move.
How to Pack a Backpack
I built a 7-step packing system to eliminate all trail friction and wasted energy.
Your packing system is broken if you’re:
- Opening the main compartment of your backpack on trail during the day.
- Using zippers, stuff sacks, hydration bladders or rain covers.
- Packing gear in unoptimized locations.
- Hands aren’t moving gear to repeatable locations with subconscious muscle memory.
Don’t worry, it’s easy to fix!
Read my complete guide on How to Pack a Backpack for Ultralight Hiking.
Layering System Basics
This section describes my layering methodology.
The following sections cover the gear list for trail layers & camp layers.
The goal is to bring the absolute minimum amount of gear required to stay warm and dry on the coldest night of the trip.
If you aren’t wearing every single layer on that coldest night, you packed too much.
Carrying redundant layers wastes physical energy, burns unnecessary calories, and forces you to manage useless weight on the trail.
There are 3 different layers, starting from skin and working outwards:
- Base
- Insulation
- Outer
Base Layer
This is the layer directly next to your skin.
It’s worn in all seasons.
You will wear a base layer for hiking and a base layer at camp.
I prefer to wear the same base layer on the trail as at camp to save weight.
This makes it easy to change from my trail to camp layering system and back.
An Optimal Base Layer:
- Keeps skin dry & protected from intense sun
- Cools in warm temps
- Warms in cool temps
- Made from merino wool. Insulates when wet & does not contain plastics that absorb into skin.
Insulation Layer
On top of the base layer, the insulation layer is added to trap body heat.
Fleece: Provides breathable, active warmth while hiking & at camp.
Down Jacket: Offers highly packable, maximum warmth strictly for camp.
Outer Layer
The outer layer’s goal is to protect your body and lower layers from the weather while trapping heat.
Except for wool, all insulation properties fail if your base or middle layers get completely wet.
- Choose materials that are ultralight and dry rapidly.
- They don’t need to be fully waterproof, but must block wind and rain while retaining body heat.
Avoid heavy Gore-Tex unless you are in extreme cold where wind protection is critical.
It will wet through after a day of heavy rain and is not truly waterproof.
Gore-Tex adds unnecessary weight and takes far too long to dry once soaked.
Black Belt Layering (Advanced)
True mastery is achieved when you know the coldest temperature for your trip and exactly what layering system is needed for that scenario.
This eliminates guesswork and ensures you never over-pack or over-layer.
You’ll need a bluetooth 24/7 thermometer to do this as discussed here.
Trail Clothes
Watch the video in the Layering System Basics section first.
Bringing duplicate pieces of trail clothes is too heavy and unnecessary.
Skip it!
Trail clothes will get sweaty, wet, and dirty.
Your goal is to constantly keep them dry, clean and ready for incoming adverse weather:
- Wash it when there is flowing water
- Dry it when there is sun or use your body heat
All trail gear is also worn as layers at camp.
I’ve placed the gear in both sections so you can see the exact system.
Worn Uppers
Trail Hat: Lightweight trucker hat.
Long Sleeve Shirt w/ Hood: Merino wool, light weight, cool in hot weather, and warm in cool weather. Hood is essential for sun and cold.
GPS Watch: Essential for knowing distance covered, elevation covered, and current weather trends such as pressure, temperature, sunrise & sunset times. My favorite feature of this watch is the topo maps. Instead of pulling out a phone to navigate, looking at the watch is much easier and saves a ton of time.
Trekking Poles: Essential for reducing stress on legs and covering long days on the trail. Also essential for off-trail travel & holding up shelters.
Quick Access Uppers

The Quick-Access Rule: Check the weather daily and store your required trail layers outside the main compartment of your pack.
Keeping them easily accessible ensures you can adjust dynamically without stopping to dig through your gear.
Fleece Hoody: Windy & cold conditions.
Wind Shell Jacket: Windy, cold, or wet conditions.
Light Gloves without Fingers: Worn on any trips above 30F.
Light Gloves with Fingers: Any trips between 30 to 20F.
Bug Net for Head: Intense bug pressure this is great for breaks.
Worn Lowers
Running Shorts: Stretchy durable material.
Short Underwear: Worn on trail & as base camp layer in warm weather.
Socks: Darn Tough socks have a lifetime warranty. If you get a hole, just send them back in for a new pair.
Compression Socks: These are worn alone, without socks. Great for long days on the trail.
Trail Runners (Altra Lone Peaks): Stop wearing boots. They are heavy, don’t provide better ankle support, and become very heavy when wet.
Trail runners are light, dry quickly, give your feet a better “feel” for the trail, and work well in all seasons. I even wear them in the winter.
Quick Access Lowers
Wind Shell Pants: Worn at camp or on the trail during windy, cold, or wet conditions.
Thermal Sitting Pad: Weighs 3 oz. Reduces your calorie burn by decreasing heat loss while sitting. Very comfortable. Taken in every season.
Camp Clothes
Watch the video in the Layering System Basics section first.
All of my layers used on trail, are also used at camp, for the coldest night of the trip.
I’ve listed them in both sections for clarity.
Base Layers
Upper Base
Merino Wool Hat: All trips, no matter the season.
Warm Weather Shirt: During late spring, summer and early fall, I wear my hiking shirt as a base layer for camp. This cuts down 6-8 oz of pack weight.
Cold Weather Shirt: Merino wool insulates even when wet.
- Winter: 320-weight merino
- Early Spring / Late Fall: 250-weight merino
Light Gloves without Fingers: Worn on any trips above 30. Great for photography.
Light Gloves with Fingers: Any trips between 30 to 20F.
Winter gloves: Below 20F. Order a size up on these and layer them with wool gloves above.
Lower Base
Short Underwear: Base Layer in late spring through early fall. Also worn on trail.
Long Underwear: Merino wool insulates even when wet & doesn’t smell.
- Winter: 250-weight merino
- Early Spring / Late Fall: 165-weight merino
Insulation Layers
Upper Insulation
Fleece Hoody: Windy & cold conditions.
Down Vest: Combined with any of the other layers to add core warmth as required.
Heavy Down Jacket: Layer the medium down jacket with the light down jacket or down vest. My preference is medium down jacket + vest.
Lower Insulation
Down Pants: Worn at camp during trips with lows in the 20s Lighter than another pair of long underwear & much warmer.
I don’t recommend heavy-down pants. They are too warm unless you’re in arctic winter environments.
Down Booties (Snow Camps): Snow means longer nights and more time spent sitting around camp after dark. Keeping your feet warm while relaxing in the snow turns a miserable night into an enjoyable trip.
Outer Layers

Upper Outer
Wind Shell Jacket:Worn at camp or on the trail during windy, cold, or wet conditions.
Lower Outer
Wind Shell Pants: Worn at camp or on the trail during windy, cold, or wet conditions.
Camp Shoes & Sandals

Don’t bring camp shoes or sandals. They are too heavy!
Bread Bag Technique:
- When you get to camp, dry your feet and put on your dry camp socks.
- Over your camp socks, put on bread bags.
- Put trail shoes back on over bread bags.
Your feet and socks will stay warm and dry inside the bread bags.
Your body heat will dry your trail shoes.
Food & Supplements
After hiking over 22,000 miles, I’ve moved away from the standard “sugar-burner” approach of high-carb, processed trail meals.
My strategy centers on the “250g Protein Secret,” a high-protein, high-fat framework designed to eliminate post-hike soreness and maximize energy.
Check out my in-depth guide & video on hiking food & endurance metabolism.
Cooking & Cold Soaking
Cold soaked meals taste just as good as cooked meals, if you know how to make them & have a few different options for taste.
I prefer cold soaking over cooking and do it on all trips, except in the winter.
Instead of stopping to cook big meals throughout the day, having food constantly ready in my cold soak container lets me eat anytime, in small doses.
This improves trail efficiency allowing me to spend more time enjoying breaks and recovering at camp and on the trail.
Stoveless Cold Soaking System
Vargo Titanium BOT 700: Doubles as my cook system and avoids cold soaking in plastics, that are horrible for your body.
Also can be used to carry 25 oz of water, instead of an extra bottle.
Stove & Cook System
Vargo Titanium BOT 700: Doubles as my cold soak system. Bring this and you can cook & cold soak when you’re in the mood.
Also can be used to carry 25 oz of water, instead of an extra bottle.
Stove Burner: Use your body to protect it from the wind when cooking. The only time I don’t use this is on trips where I have to melt snow for water. For snow trips, I use a Jetboil.
Fuel System
Fuel Transfer Device: Buy the large 16 oz fuel and use this to refill your small canisters for the trip length below.
4 Oz. MSR Fuel: 2 days in winter when melting snow / 3-5 days in other seasons.
8 Oz MSR Fuel: 4 days in winter when melting snow / 6-10 days in other seasons.
Hydration System
Water Storage
Avoid heavy hydration bladders.
They require emptying your pack to refill and incentivize over-carrying, adding 2–4 lbs of unnecessary water weight.
Use a simple titanium water bottle!
Water bottle must be accessible from side pocket without removing pack.
If you’re removing your pack to drink water, that’s tons of wasted energy & time.
My Plastic-Free Setup (50 oz Capacity)
Titanium Water Bottle (25 oz): Eliminates the microplastics and chemical leaching found in plastic or standard metal bottles.
Vargo Titanium BOT 700 (25 oz): Performs double duty as a cold-soak/cooking pot on trail and a sealed 25 oz water container at camp.
By cooking and eating entirely on the trail before arriving at camp, your camp routine is reduced to setup and sleep.
Arriving fully hydrated means you only require 50 oz of water before the next morning’s first water stop, in most cases.
This allows an entirely plastic-free, toxin-free water system using two components:
Dry Conditions (2-8L Capacity)

2L Water Bag: 1-3 depending on ecosystem.
Used exclusively for high-volume desert water hauls or dry camps in any environment.
Water Purification
In most cases I don’t filter or clean water and drink it right from the source.
This does not mean that you should use my system.
I’ve never been sick in 22,000 miles of hiking, which means I’m picking sources correctly.
I carry Aquamira water tabs for the situations where I don’t trust the water.
They are light and take 5 seconds to deploy.
My Hydration System
Carrying too much water is a huge mistake that MOST hikers make.
Every time I’m at a water source:
- Drink until my stomach is full
- Determine next guaranteed water on map
- Determine how much water I need to get there
- Fill that much water only
- Add electrolytes
- BEFORE LEAVING: Pee should be clear. Light yellow is ideal, but it’s too hard to hit that perfectly, so just use lots of electrolytes & constantly drink water.
I’ve never been dehydrated or run out of water.
Small Essential Gear
This section covers task-specific small items that are required for every backpacking trip.
Keep them in a small pod at the very top of your main compartment for easy access.
This makes it very easy to move all your gear from pack to tent without opening tons of pockets or looking for lost items.
Hyperlite Pod (16L): Holds all small essentials below.
Electronics
Small External Battery Charger: 3-4 days of charge for Nikon, Go Pro, and phone.
I love this battery because you can charge two things at once.
Large Battery Charger: Week trips. Instead of buying a big one, take two of the small ones above. If one fails you’re not out of power completely.
Personal Hygiene
Small Camp Towel: Way better than normal camp towels. Can also be used to remove condensation from tent.
Floss: Plastic free
Toothbrush: Plastic free
Tooth Paste Container: 1 oz
Environmental & Repair
Sun Protection Lotion: Use a 2 oz jar and fill it with lotion to reduce weight.
Mosquito Net: Only taken during high bug pressure times.
Sun Glasses: Essential for snow trips. I don’t take otherwise.
Tyvek Tape: Essential to repair & patch tents, sleeping pads, packrafts, or any other piece of equipment. Strong & light. Backroll a small amount, just enough for trip.
First Aid & Emergency
Here’s my complete guide on What Should Be in a Hiking First Aid Kit.
I also highly recommend a Garmin In-Reach Mini. It’s essential for weather & 2 way communication.
Navigation & first aid are the two most important backpacking skills.
Always carry a hard copy map as a backup, a digital map on your phone, and a compass.
All of this equipment is worthless if you’re not an expert at using it.
Take a class or go out & teach yourself in a safe area with phone service.
Here is what I use:
Digital Maps: I use and recommend GAIA GPS.
It’s great for planning on the computer and navigating in the field using a smartphone.
Physical Maps: Print maps off GAIA GPS or buy National Geographic Trails Illustrated Maps.
Toilet Kit

Bathroom Technique
Pee anywhere off the trail preferably on rocks or gravel.
Poop using the following technique.
Carry out all dirty toilet paper with you.
- Locate an area with soft organic matter at least 200 feet away from any water sources.
- Organic matter will decompose human waste, rocks and sand will not.
- Dig a hole 6-8″ deep, with 6-8″ diameter.
- Upon completion, backfill the hole and firmly stamp it down.
Bathroom Equipment List
Gallon Ziplock Freezer Bag to hold the following.
Deuce Bathroom Shovel: Weighs less than an ounce. Strong. Works well!
Toilet Paper – Thin Ply: Backroll it and only take enough for the trip. Keep in a small ziplock bag.
Hand Sanitizer – Travel Size: Small travel size. Keeps you from getting sick on the trail from dirty hands.
(2) Quart Ziploc bags for dirty toilet paper. Put the dirty toilet paper in one bag, then double bag it to keep things clean.
Snow Poop Bags: All snow trip. Don’t poop in the snow. It will melt out in the spring and is disgusting.
Bear Proof Food Storage
Do what makes you feel comfortable.
Just because I use one method does not mean it will be right for you.
If I need to cache food or leave it alone for a day, then a Ursack Major Bear Bag is used for protection along with hanging it from a tree if available.
I don’t use bear containers & sleep with my food by my head, unless in grizzly country.
Bear cans are heavy, bulky, and horrible for enjoyable backpacking trips.
Some parks without grizzly bears require them because government & nuance don’t mix.
The bear can I used in the past is now a stool for sitting by the campfire.
It worked well…if you want to carry around a bear can.
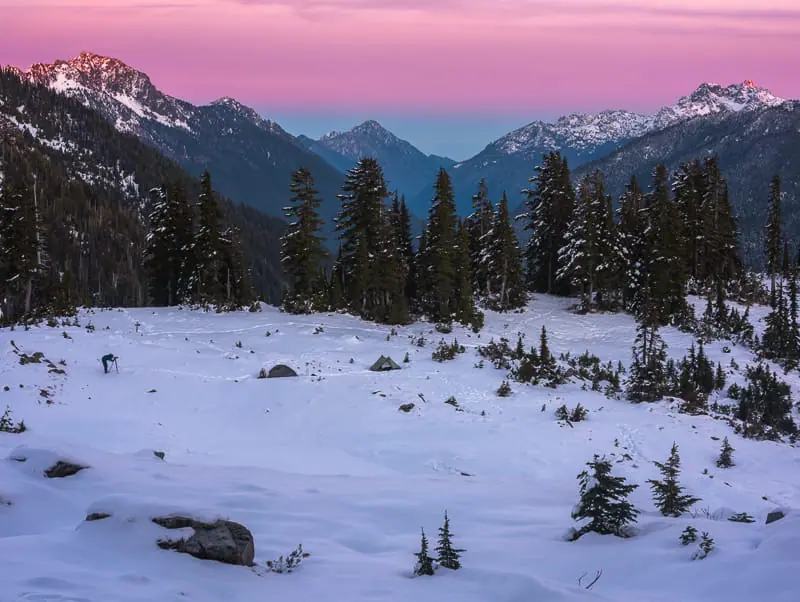
Snow Hiking Gear
If you’re just starting out, skip the snow and winter camping.
It’s too much gear and extra skill when just starting.
Ice Axe: Any steep ice or snow travel without safe runout. Does not work if you don’t know how to use it!
Micro Spikes: Non-glacier ice travel
Neoprene Booties: These are used to keep my feet warm while hiking in deep snow with trail runners. It’s much warmer than wearing boots.
Snowshoes: 6″+ deep snow or more. I use these with my trail runners.
Poop Bags: All snow trip. Don’t poop in the snow. It will melt out in the spring and is disgusting.
Wax Fire Starters: Emergency use & standard fires. It’s sometimes impossible to find dry wood in the winter.
Rescue Shovel: Great for moving snow to set up camp and avalanche rescue.
Avalanche Beacon: Only works if you learn to use it very well & practice.
How to 10X Your Learning Speed
The fastest way to master landscape photography is by learning firsthand from someone who has spent over a decade optimizing these skills through trial and error.
Blogs and videos are great for theory, but they cannot replace real-time, field-based instruction.
I offer high-intensity workshops and tours designed for all skill and fitness levels.
In a single 3-day session, I can teach you my entire system—start to finish.
You will receive 1-on-1 feedback in the field that will improve your skills faster than years of self-teaching ever could.
My students often learn more in three days than they have in the previous 20 years on their own.
Stop guessing and start creating portfolio-grade images.