 What if everything you’ve been taught about how to take landscape photos is wrong?
Most photographers are making landscape photography mistakes like:
- Shooting manual mode
- Owning more than 2 lenses
- Using a tripod
- Depending on autofocus
- Arriving late without a plan
This is the fastest way to fail.
I created this 5-step system to strip away the stress and guarantee a “Heck Yeah” shot every time there is good light.
In 15 years as a professional, this system has never failed me.
Now, you can use it too.
Table of Contents
Video: How to Take Landscape Photos (My System)
Watch the video first, then read the guide.
Step 1: Escape the Tripod Trap
Immediate tripod deployment at a new location is a critical error.
A tripod serves as a “composition killer” if introduced too early in the process.
This mechanical constraint often leads to settling for a “good enough” shot just to avoid the friction of relocating gear.
You must begin handheld to maximize speed, maneuverability and creative flow.
The “Center of Attention” & Visual Flow
Before I even look at my camera settings, I’m searching for my Center of Attention (COA).
- As I explain in my composition guide, the COA is the anchor of your photo—the place where the viewer’s eye ultimately wants to rest.
- It’s the object that if removed, the entire photo falls apart.
By shooting handheld, I can move up, down, and side-to-side with zero friction.
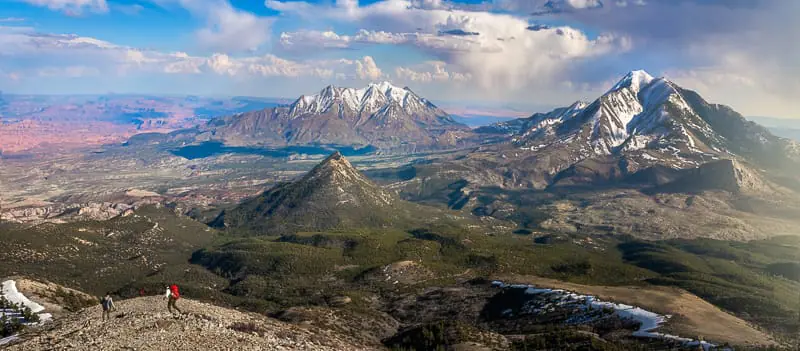
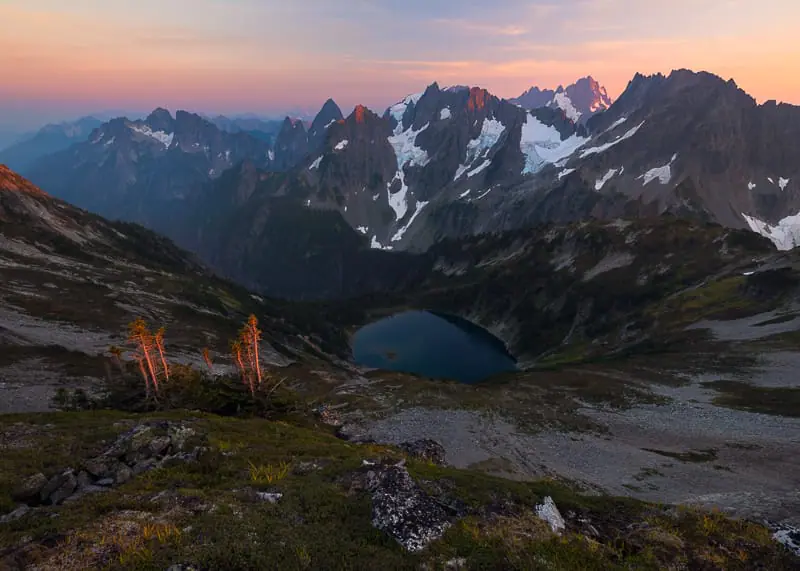
I’m looking for how the foreground elements—like the gnarled sub-alpine firs or the leading lines of the granite slabs—interact with the COA.
Your goal is to move the eyes along a “Visual Path”, or “leading lines” that leads the eye from the bottom/sides of the frame straight into the heart of the COA.
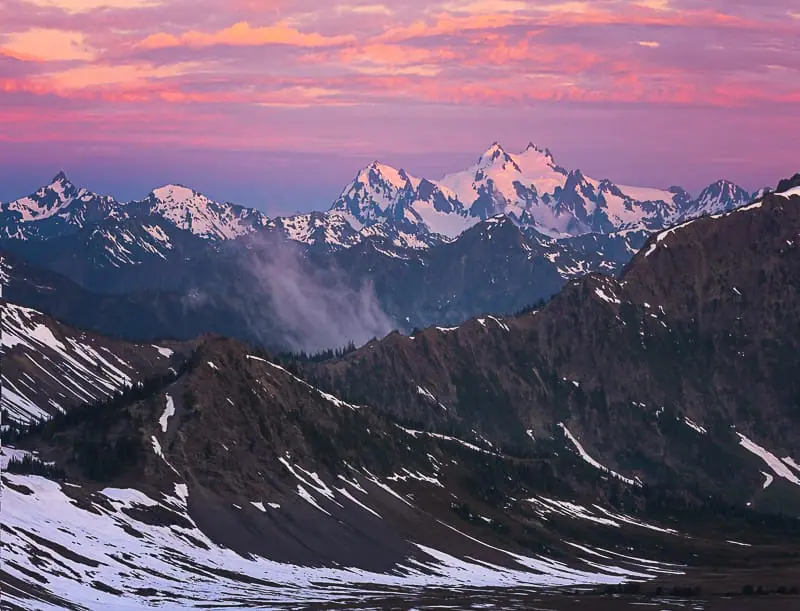
Creating Scale and Depth
One of the biggest struggles in wilderness photography is capturing the true scale of the landscape.
If you just point your lens at a mountain, it looks flat.
To fix this, I look for a Scale Factor.
I move my camera to find foreground elements that show the scale of the COA.
By getting low to the ground near a leading line of rock or positioning myself so a tree branch frames the upper corner, I create layers of depth.
These elements provide a frame of reference for the viewer’s eye, showing them exactly how massive that alpine basin really is compared to the trees at my feet.
While using a tripod you would miss out on these low to the ground compositions.
Rapid Iteration
The real power of the handheld method is speed.
- Your brain can only generate composition ideas as quickly as you can set up the shot.
- In the time it would take you to fumble with leg locks and level a tripod head, I’ve already tested ten different angles.
- This rapid iteration gets the creative juices flowing & removes the stress of having to find a perfect shot right away.
I’m taking “sketch” photos—disposable frames that allow me to see exactly how the sensor interprets the geometry of the land.
I’m not worried about noise or slight camera shake.
Composition, Color & Light is all that matters in this step.
Only after I find a composition that makes me scream “Heck Yeah” in my head do I allow myself to unstrap the tripod and lock it in.
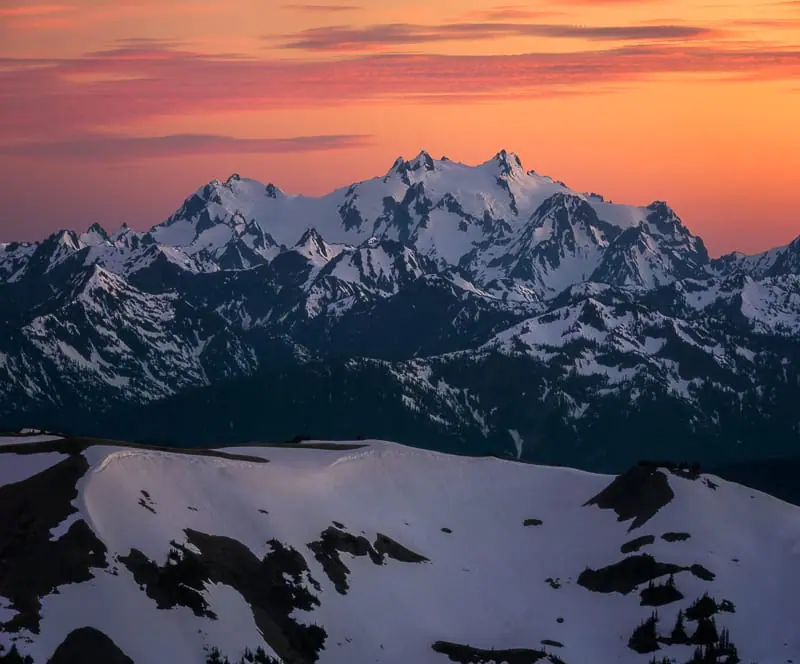
Step 2: Predict the Light Path
Once the composition is identified, the focus shifts to where you THINK the light WILL hit the landscape.
Predicting the sun’s trajectory is the difference between a portfolio shot and a wasted hike.
Face-Light Analysis
Analyze the scene’s geometry in relation to the sun’s current position.
This applies to mountain faces, canyon walls, trees, cliff faces, ferns, or any other object that will catch light.
- Identify west-facing features that will catch the direct “glow” as the sun drops.
- Reverse this for sunrise.
- You can do the same for moonset and moon rise.
Where will the light hit the foreground?
Will it still hit the foreground during sunrise or sunset, when the light is peak?
Remember:
- Bright / Saturated areas draw attention
- Dark / desaturated areas don’t draw attention.
How can you use the light to move the viewer’s eyes towards the COA and away from the boring parts of the scene?
Visualize Cloud & Light Breaks
When out on a shoot study how the light and clouds move throughout the day and their patterns near sunrise and sunset.
- Do they clear every morning before sunrise with fog rolling in?
- Do the clouds get more dense near sunset as the temperature drops?
- These are just two out of hundreds of examples of weather patterns.
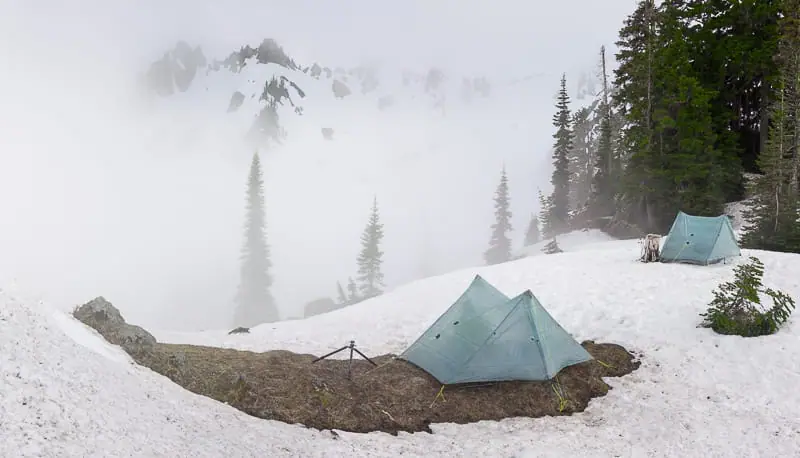
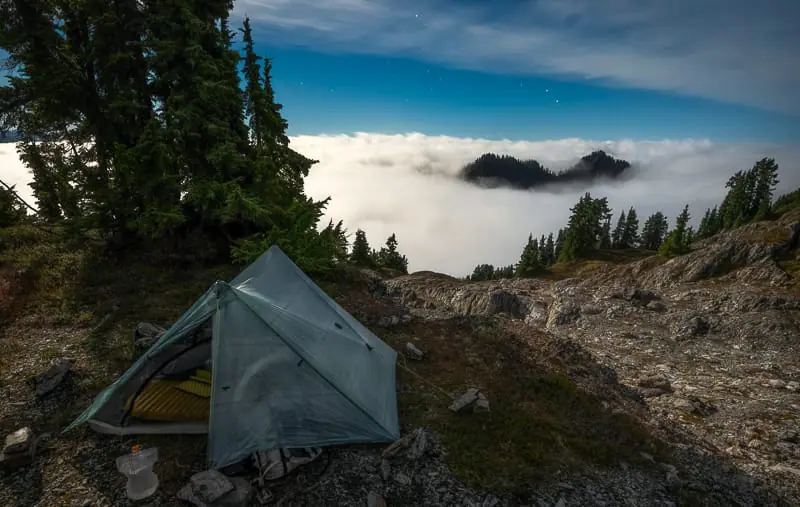
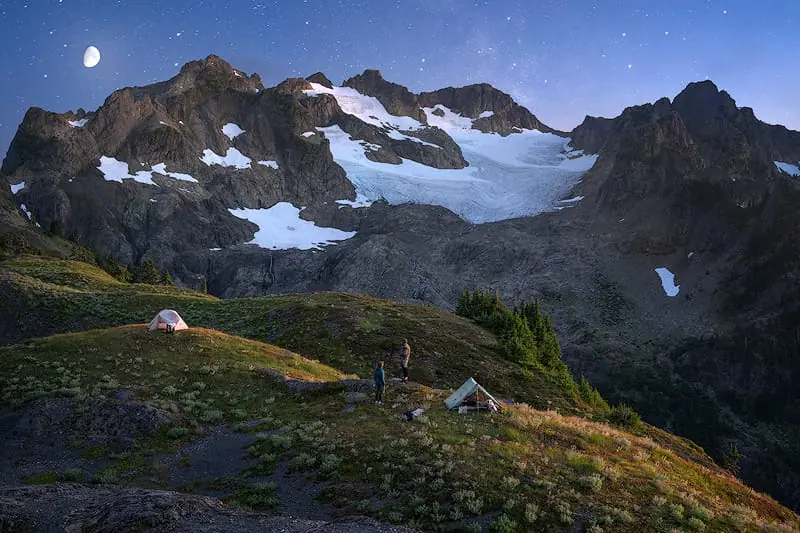
This is why living out of a tent is a cheat code for landscape photography.
You are always outside and get a great feel for weather patterns.
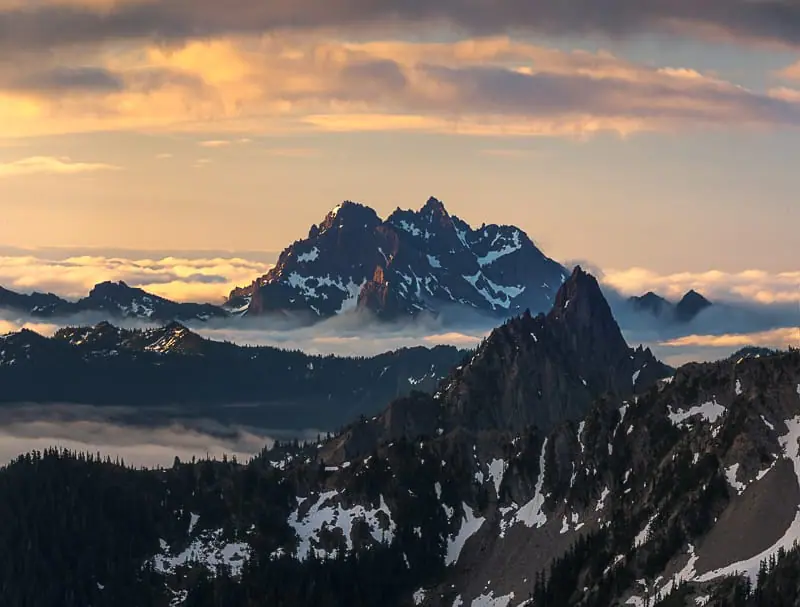
Take educated guesses where the light may hit the landscape during the “good light”.
Look for gaps on the horizon that allow the sun peek from between the clouds as it sets or rises.
This creates “under-lighting,” which illuminates the base of the cloud layer and adds immense texture to the sky.
If the horizon is blocked, the light will likely go “flat,” requiring a pivot in strategy.
Become an Expert at Weather & Light
When not on photo trips, I study topo maps & weather constantly.
I use this information to design new hikes & photography trips:
- Study Windy.com to see the patterns of weather in the areas you most often shoot.
- Study Google Earth to see where the light hits the landscape.
- Study Topo maps to see the terrain that might make for perfect lighting at sunrise and sunset.
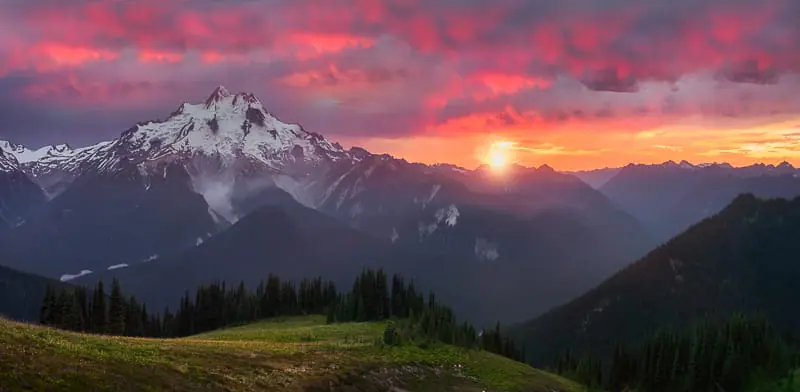
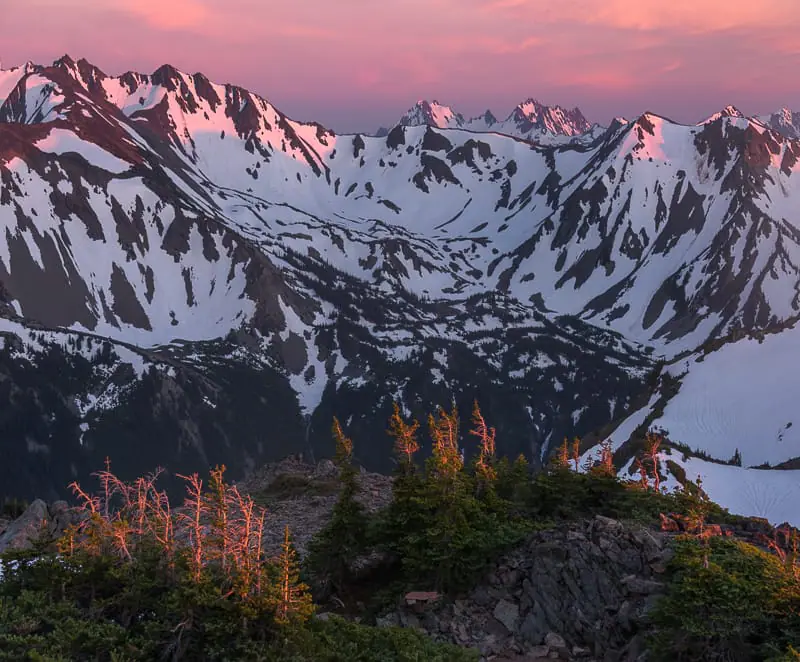
Anticipating Color Harmony
Anticipate the color harmony using a color wheel, before the colors actually manifest.
If the sky begins to shift toward magenta or red, look for complementary colors in the landscape.
Green moss or sub-alpine firs provide perfect Color Harmony when paired with a red or pink sky.
Reference the color wheel to ensure these elements sit across from each other for maximum visual impact.
The “Heck Yeah” Requirement
Everything in Step 2 is a gamble based on weather and timing.
If the light fails to hit the primary composition & COA, do not force the shot.
A successful scout that results in “no shot” is better than a mediocre photo that lacks impact.
Trust the system—if it doesn’t scream “Heck Yeah” in the viewfinder, keep searching or wait for the next window.
Step 3: The Technical Lockdown
Now that the “playtime” is over and I’ve found the spot, the tripod comes out.
This phase is about removing all technical guesswork & stress when the good light arrives.
I run through the exact settings and workflow that I’ll use when the light is good.
This is a practice run to tease out any flaws in my shooting process before it’s go time.
Set the Anchor
Set the tripod exactly where the handheld “sketch” photo was taken.
Ensure the tripod is stable & level! So many people fail on the easiest step
Once the camera is locked down make small adjustments to the composition to dial it in perfectly.
The Focus Strategy
Don’t trust the camera to pick the focus point for you.
EVER!
Use Back-Button Focus & Hyperfocal Distance to decouple the shutter from the focusing system.
- Hyperfocal distance is the closest thing you can focus on in the scene where everything beyond that, to infinity, is also in focus.
- It’s the optimal focus point for any composition.
The Jiggle Test: Manually jiggle the focus ring back and forth while using 100% magnification in Live View.
This ensures that your back button focus nailed the focus.
Only stop when the textures are are tack-sharp.
Aperture Selection & Depth of Field
For 99% of shots, f/11 is the baseline for sharpness and depth of field.
If the composition features a massive foreground element—like a rock only two feet from the lens—bump to f/16.
This provides a “safety net” to ensure the entire scene, from the trees at the bottom to the peaks at the top, is in focus.
Beyond f/16, diffraction starts to set in, so keep it within the sweet spot.
Never use focus stacking unless you’re absolutely forced to when f/16 at hyperfocal fails.
Exposure Strategy: ETTR
As I explain in my Aperture Priority guide, the goal is to maximize data/light collection, not just make a “pretty” image on the screen.
Use Expose to the Right (ETTR).
This ensures the cleanest shadows and highest signal-to-noise ratio in the RAW file.
If the sun is hitting the peaks, watch the right side of the histogram like a hawk to avoid “clipping” the highlights.
Also check the Red, Green and Blue histogram channels specifically to make sure you’re not clipping a single color.
Handling the Elements
Before every shot ask yourself:
Does shutter speed matter for this shot?
For 90% of shots shutter speed doesn’t matter at all.
But when it does, you can’t mess it up, or the shot is ruined.
How fast do you need it to freeze everything in place?
- A shutter speed of 1/focal length or faster is a good starting place for windy conditions.
- For example, shooting at 14mm you would need a shutter speed of 1/14th of a second or faster.
If the wind is kicking up and the trees are moving, ISO 64 might not cut it.
Don’t be afraid to bump to ISO 200, 400 or even 800 if absolutely required.
Test your ISO using this technique.
A little noise is easy to fix in post; a blurry, wind-blown tree in the foreground is a “composition killer.”
Step 4: Optimize Your Composition
Next, you need to make sure your composition is perfect & there aren’t any errors in your logic from step 3.
You can cycle back and forth between step 3 and step 4 until the setup is perfect.
It’s a feedback loop of composition and camera settings, until you’re fully confident & ready for the good light!
If you fail at this step, your shot is worthless.
Here are some tips to look for.
Managing Visual Path and Leading Lines
As detailed in my composition guide, your goal is to create a Visual Path or Leading Line that moves the eye through the frame.
If a rock or tree branch is cut off by the edge of the frame, the eye “falls off” the edge and the composition fails.
The goal is to constantly move the viewer’s eyes through the scene until it finally reaches the COA.
Every element in the frame must have a purpose; if it doesn’t, it’s a distraction that needs to be removed.
Managing Motion and Water
Environmental movement often requires a change in camera settings.
Ask yourself before every shot:
- Does shutter speed matter?
If wind is creating ripples on an alpine lake, the reflection of the peak will look broken and distracting.
Use a slower shutter speed—around 1/3 to 5 seconds —to smooth out the water’s surface.
This turns a choppy lake into a clean, reflective mirror that reinforces the Center of Attention.
If the wind is too high, bump the ISO to maintain shutter speed and freeze the foreground firs.
Never settle for “motion-blurred” trees in a high-quality landscape.
Don’t be afraid to use ISO!
Extending the Field of View with Panos
Don’t do this unless you’re already at your widest possible focal length!
Simplicity is king. Only add complexity when forced by the landscape.
You can also use the tips in post processing, as covered here.
Step 5: Wait and React for the Perfect Landscape Photo
Once the technical lockdown & composition optimization is complete, the role shifts from engineer to creator.
- The system is dialed, the tripod is anchored, and the visual path is established.
- Now, the only variable left is the environment.
Landscape photography is a game of patience—the “Wait and React” phase is where a “good” shot becomes a portfolio image.
The Interval Strategy
As the light begins to shift, do not wait for the “peak.”
You never actually know when the peak was until it’s over.
Fire the shutter every 30 to 60 seconds as the atmosphere evolves.
Don’t do this like a robot zombie with a timer.
- Take the shots as the light changes and meets your requirements.
- There should be a reason you take each shot!
- You’re building a portfolio image.
Light moves at a high velocity in the wilderness; a peak may glow for only 15 seconds before a cloud ceiling shuts it down.
Don’t change your composition! Trust the “heck yeah” process and continue to shoot your favorite composition.
On the computer you can blend different shots of this same composition together, if required.
Here are some examples of my usage of this technique for:
Dynamic Landscapes: Reacting to the Scene
Different environments require specific observation skills during the wait:
-
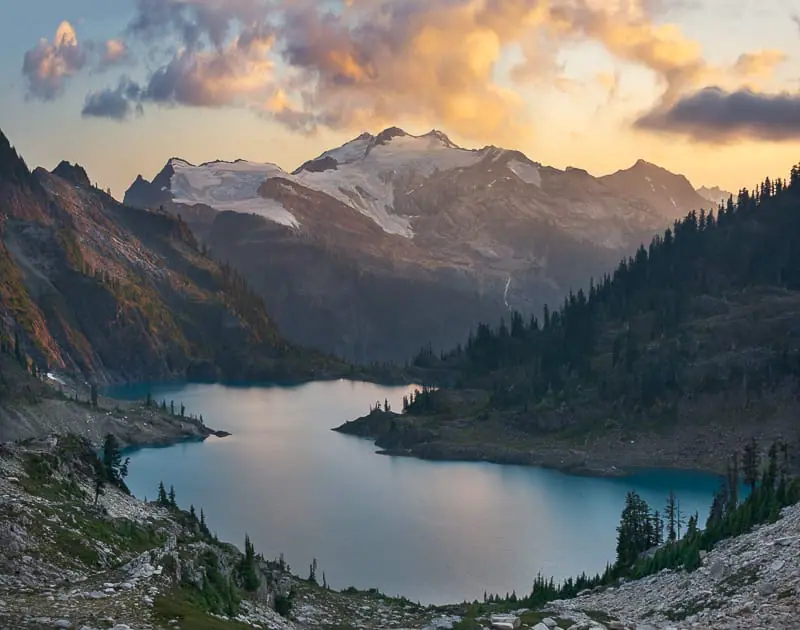
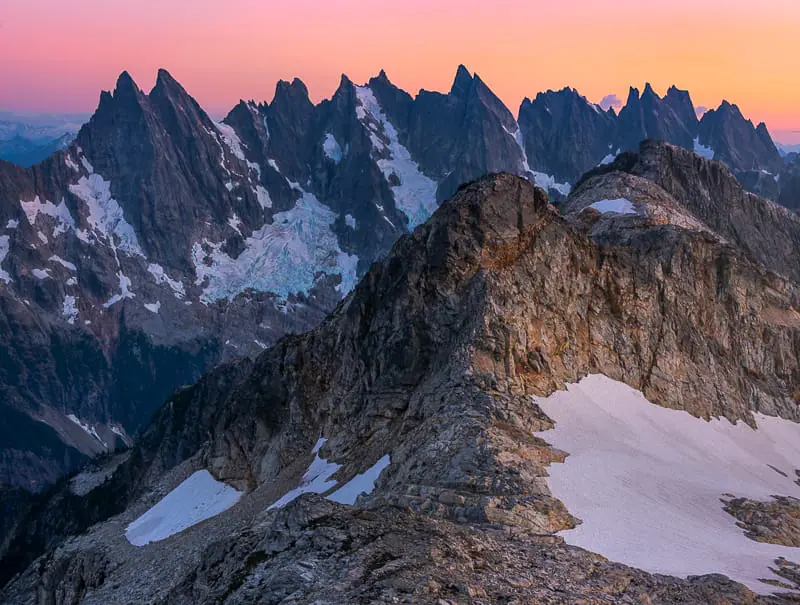
Alpine Basins & Peaks: Watch the “Glow Line.” As the sun drops, the light climbs the peak. The “Heck Yeah” moment can happen well before the sun dips or after. It depends on if your foreground needs light for the composition to survive.
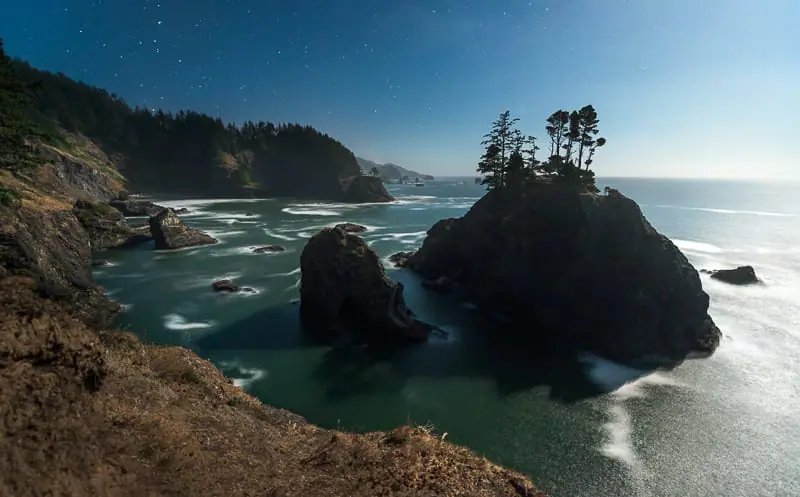
-
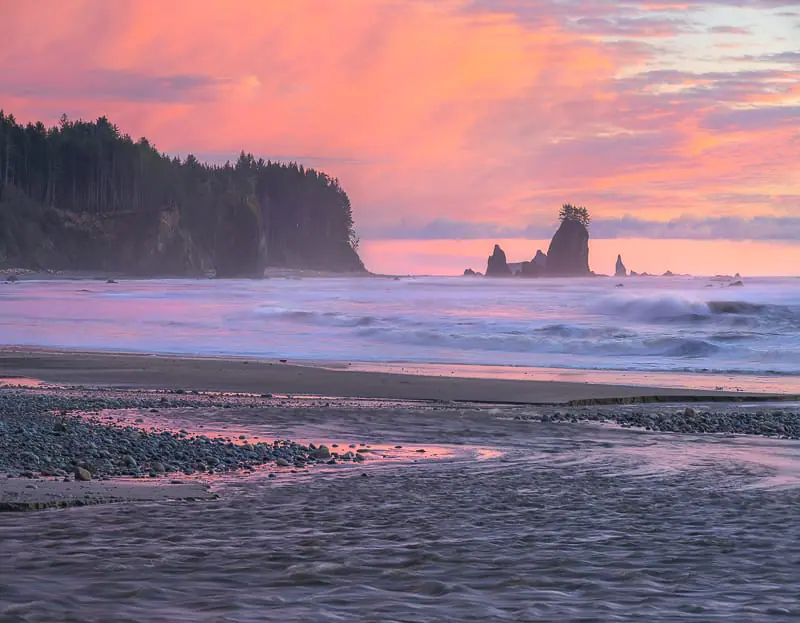
Ocean & Coastal Scenes: Watch the tide and the “Receding Wash.” The goal is to fire the shutter as a wave pulls back, using the white water to create leading lines toward the horizon.
-
Desert & Sand Dunes: Watch the shadows. In the desert, texture is king. Wait for the sun to get low enough that every ripple in the sand casts a long, high-contrast shadow.
-
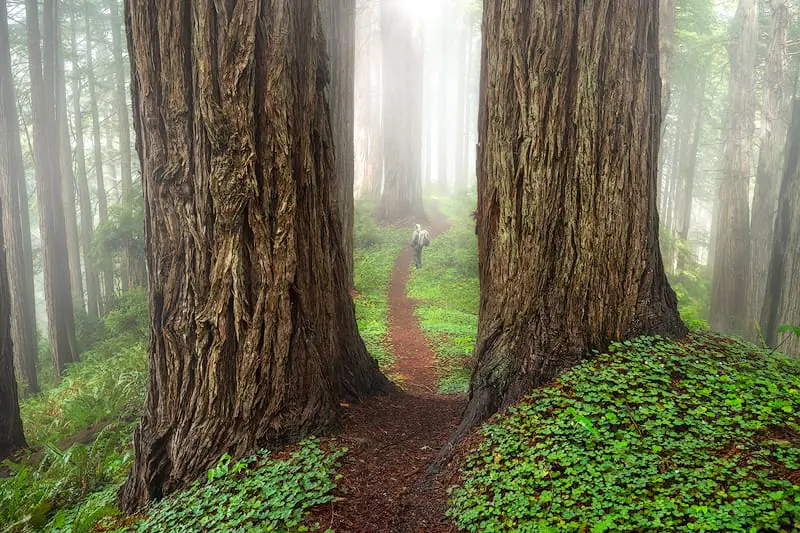
Forests & Woodland: Watch for “Light Beams.” In dense forests, wait for the sun to hit a pocket of moisture or dust to create god-rays that point toward your Center of Attention.
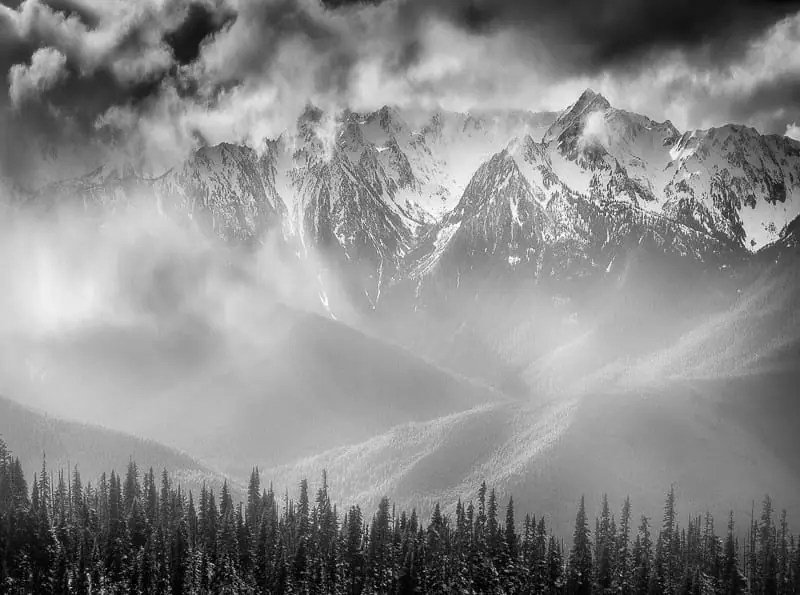
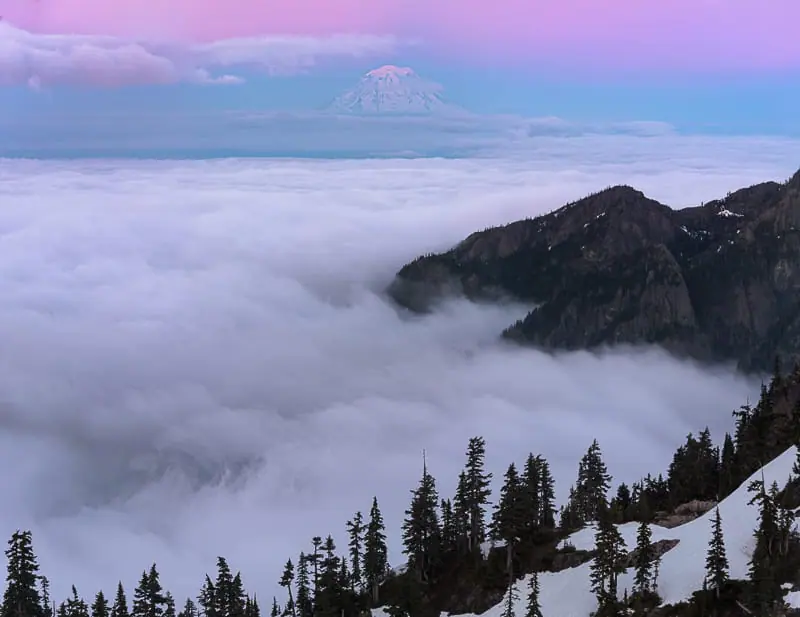
Weather Conditions: Timing the Shot

The weather dictates the “React” portion of the system:
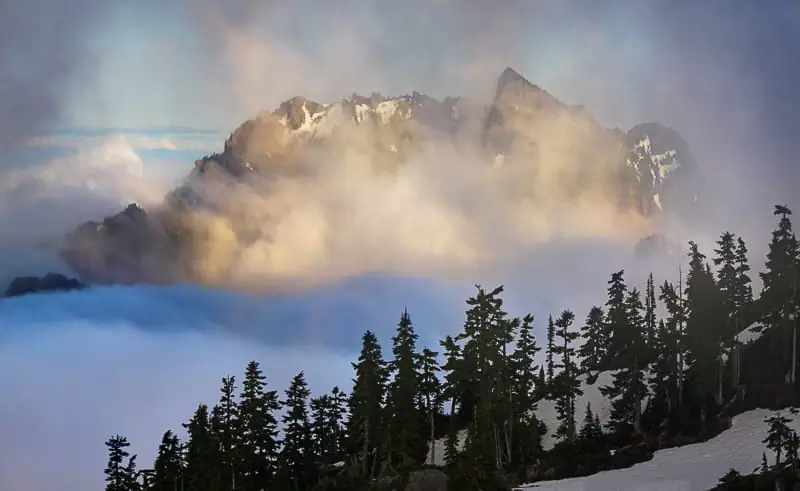
-
Moving Fog & Mist: Never stop shooting. Fog is highly dynamic and can reveal or hide a mountain in seconds. Wait for the “break” where the peak is partially visible but surrounded by atmosphere for maximum mystery.
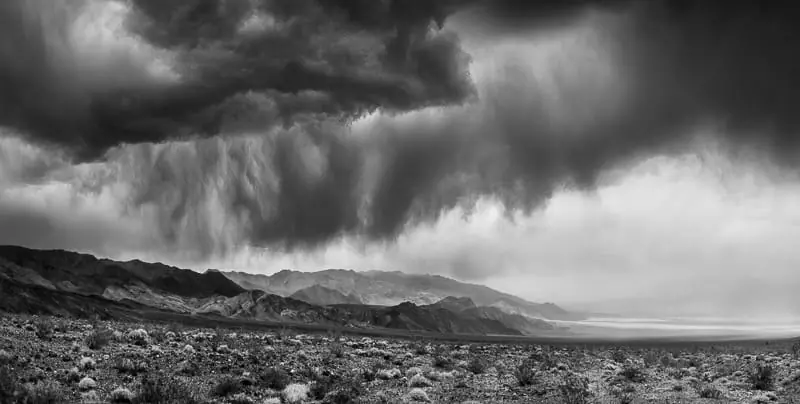
-
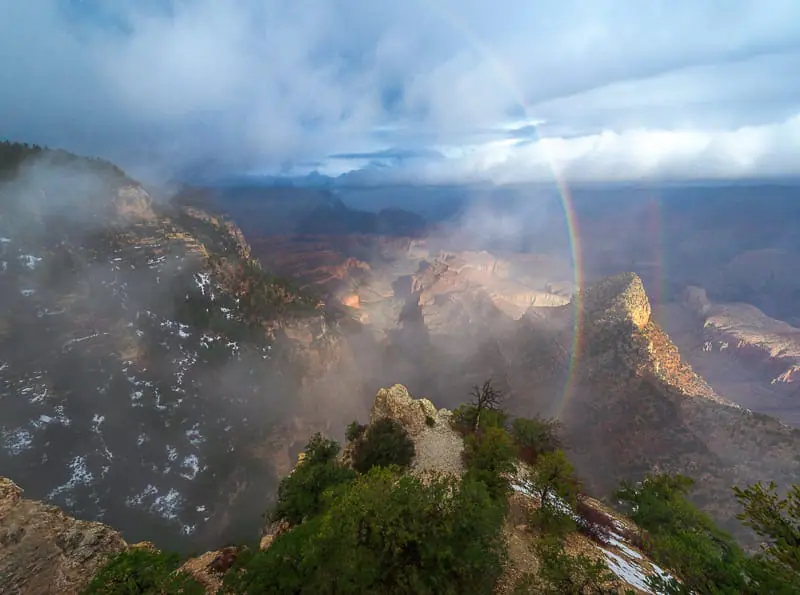
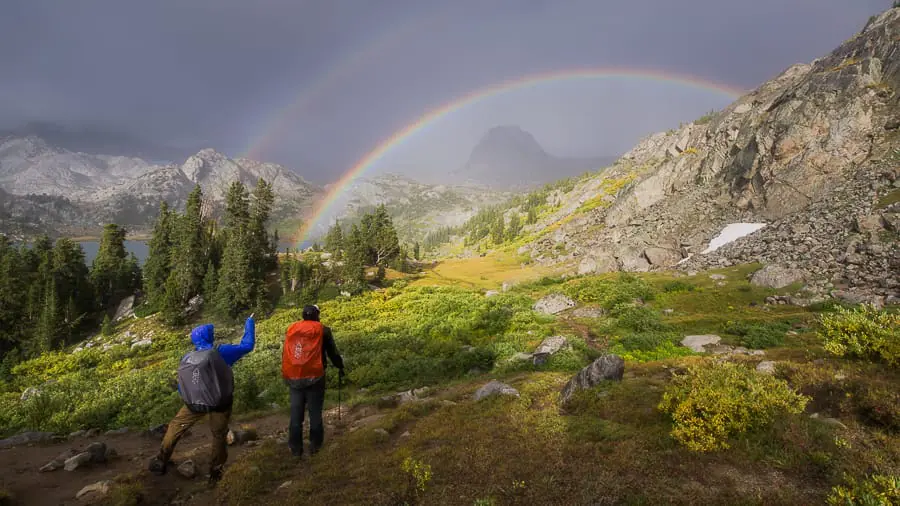
Clearing Storms: This is the highest potential for a portfolio shot. Wait for the moment the sun breaks through the trailing edge of the clouds. This creates high-contrast “spotlighting” on the landscape & may include rainbows.
-
High Wind: If the wind is gusting, wait for the “lull.” There is almost always a 2-second window of stillness between gusts. Use that window to fire the shutter and ensure the foreground foliage is tack-sharp.
-
Moonlight & Night Scenes: Watch the moon’s position. If shooting a moonlit landscape, do it when the moon is 45 degrees or less above the horizon. This provides side-lighting that defines the texture of the rocks and trees.
The “Skunked” Factor
Accept that 99% of the time, the environment will not cooperate.
The clouds may block the horizon, the fog may turn into a total white-out, or the wind may never stop.
If the scene fails to meet the “Heck Yeah” requirement, do not force the shot.
A professional knows that a successful scout resulting in “no shot” is still a victory.
It builds the scouting muscle and ensures that when the “perfect” light finally arrives, the system is ready to execute without error.
When it finally aligns, it’s all worth it!
How to 10X Your Learning Speed
The fastest way to master landscape photography is by learning firsthand from someone who has spent over a decade optimizing these skills through trial and error.
Blogs and videos are great for theory, but they cannot replace real-time, field-based instruction.
I offer high-intensity workshops designed for all skill and fitness levels.
In a single 3-day session, I can teach you my entire system—start to finish.
You will receive 1-on-1 feedback in the field that will improve your skills faster than years of self-teaching ever could.
My students often learn more in three days than they have in the previous 20 years on their own.
Stop guessing and start creating portfolio-grade images.