Most hikers obsess over the base weight of their pack, but they completely ignore the heavy physical cost of fatigue.
Maximizing recovery is the ultimate secret to enjoying high-mileage days.
My strategy is built on a calculated balance: go as light as humanly possible, but never at the expense of deep, restorative rest.
Why Most “Ultralight” Systems Fail:
- The Fatigue Trap: If your gear doesn’t match the volatile conditions, you won’t sleep, you won’t recover, and your “adventure” quickly turns into a miserable grind.
- Calorie Hemorrhage: Sacrificing insulation leaves you shivering at night, which forces your body to burn massive amounts of calories just to stay alive—requiring you to carry even more food weight to compensate.
- The “Stupid Light” Penalty: Saving 2–3 ounces by using a tiny, uncomfortable pad results in a massive drop in sleep quality that isn’t worth a single “gulp of water” in weight savings.
I’m going to show you why carrying a few extra, calculated ounces is the smartest investment you will ever make for your performance.
Table of Contents
Video: Ultralight Sleep System
Step 1: Camp Site Selection Checklist
Match the site to your specific tent footprint: Look for “Long and Skinny” vs. “Square” Spots: A Zpacks tent often needs a long, skinny spot, whereas a tent like the Big Agnes Copper Spur needs a more square area.
Test Drive the Ground: Don’t just look at it; lay down on the bare ground before setting up. This ensures the spot is actually flat and identifies any hidden lumps before you pitch.
Clear the Debris: Manually clear out sticks and small rocks. This prevents punctures and ensures your tent floor lasts much longer.
Check for Widow-Makers: Always look up. Scan the immediate area for standing dead trees or large dead branches that could fall in a windstorm.
Avoid Deep Valley Floors and Hollows: Cold air collects in low areas, making them significantly chillier and more humid than a spot slightly higher up the slope.
Distance from Water (200 Feet): To reduce condensation and avoid swarms of bugs, camp at least 200 feet away from lakes or streams.
Identify Natural Windbreaks: Look for large rocks, bushes, or healthy trees to act as a leeward shield against prevailing winds.
Avoid Drainage Paths: Look for signs of water flow like gullies or depressions where water might pool during a heavy rainstorm.
Capture the Morning Sun: Point the head of your tent toward the east. Catching the first rays of sun helps dry out morning dew and nudges you out of the sack for early shoots.
Step 2: Shelters – Tents & Tarps
The goal for ultralight hiking tent / shelter selection is to use the lightest setup possible while maximizing sleep and recovery.
If you don’t sleep well in your tent or shelter because it doesn’t fit to the current conditions, then you won’t recover well or enjoy your days on the trail.
It’s better to carry a few more ounces of weight to increase sleep and recovery.
I use 3 different shelter setups to reduce my weight for specific conditions.
You can use a single tent setup to cover all of these scenarios but you’re setup will be heavier.
Tarp Knowledge
Tarps are the lightest and most versatile setup for ultralight hiking shelters.
I use tarps most often in March – June in all ecosystems when the deep snow has melted and before there are many bugs.
They provide great protection against rain, light snow and light wind.
Pros:
- Lightest setup at 8 oz.
- Can be pitched for different scenarios.
- Open feel with great views from inside
Cons:
- No bug protection
- Does not hold heat as well as tents
When & Why I Use Tarps
Tarps can be pitched in a wide variety of different setups, but the only 2 I use are Full A-Frame and Half A-Frame.
Full A-Frame is used when you need precipitation protection and/or wind protection.
It also holds in somebody heath warmth but nowhere near as much as a tent.
Half A-Frame can be used when there is no of very light precipitation.
This is my favorite setup because it’s a slanted roof with light wind protection that gives a great view of the outdoors.
Using this setup is almost like cowboy camping with no shelter at all.
Tarp Gear List – My Setup
8X10 Dyneema Tarp: This is a 2 person tarp and has a huge footprint giving the ultimate protection for precipitation while weighing only an ounce more than the 7.5’X 9’ tarps made for 1 person.
I use it as a 1 person shelter giving me much more space to relax and move around during bad weather.
8 – Groundhog Mini Stakes.
Shami to dry off tent – Also used as hiking towel.
Ground Sheet: Polycro is a thin plastic material that only weighs a few ounces and holds up very well to wear and tear. I have used my current ground sheet for 100 nights and it still has no punctures.
I don’t recommend dyneema ground sheets. They weigh more and are overkill for ground protection.
3 Season Tent Knowledge
If you’re only going to buy 1 tent or shelter this would be it.
I only use it when there are bugs and no snow.
Pros:
- Hold heat well
- Better protection from wind and precipitation
- Mentally gives you a break from the outdoors at night if you enjoy that kind of thing
Cons:
- Heavier than tarp
- More expensive
When & Why I Use 3 Season Tents
It will work well in all seasons and conditions, except when there is deep snow that you can’t clear off to the ground.
The main times I use this tent are July – October.
When there are bugs in the summer it provides great protection with while still maintaining good views from inside of the tent.
When the mountains start to get cold in September- November and precipitation increases.
It provides great protection against precipitation and wind, while holding more heat than a tarp.
I’ve measured the temps inside my tarp and inside my tent during 30 degree nights.
The tarp ends up being 2-3 degrees warmer than the outside air temp when pitched in a A-Frame configuration.
The tent ends up being 8-10 degrees warmer than the outside air at night.
Wind protection is also a big deal in the mountains when it’s cold.
Although a tarp can be pitched to protect against wind, it has a gap between the edges of the tarp and the ground so there is always more airflow than my tent.
Under heavy winds this makes it harder to sleep since the air is colder and constantly moving over your body.
Using a tent in these conditions I have much better sleep and recovery.
This tent and the tarp won’t work in deep snow because they aren’t free standing and it’s impossible to get enough purchase in the ground even with snow tent stakes.
Material
This tent is 100% waterproof dyneema material.
Unlike cheaper tents that are made from nylon this material cannot be penetrated by water.
After a heavy rain or snowstorm you can shake it out and the material quickly dries and is stays light since it isn’t holding water.
Nylon tents start to leak after heavy rainfall and take a long time to dry out, usually requiring sunlight which may not come for days.
They are much heavier to begin with and can add an extra 8-12 ounces of water weight after heavy rain that has to be carried until it can be dried out.
Living Space
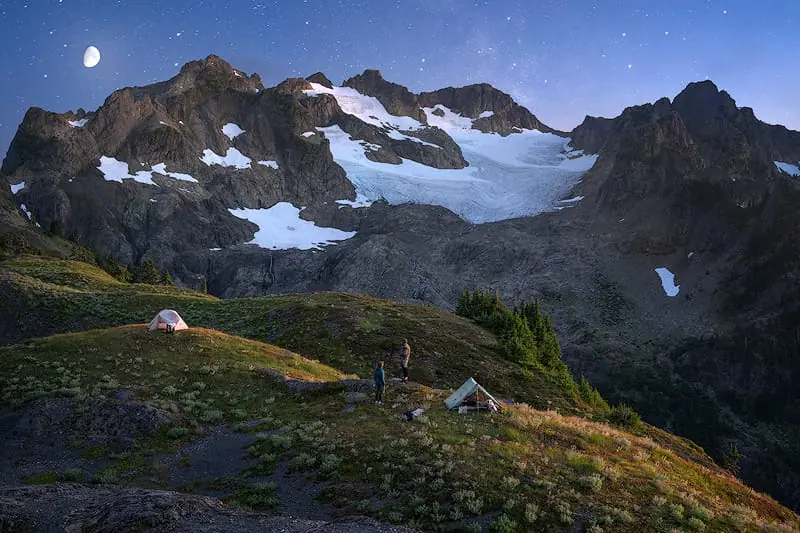
As a landscape photographer the best photos come from the most volatile weather, so I’m often out in huge storms.
Since this tent is so light I use the 2 person version which allows me to keep my backpack and all equipment inside the tent with lots of extra room for sleeping.
This keeps all equipment dry during big storms and allow men to fully setup and move around in cases where I need to be in the tent for prolonged periods of time during storms.
Versatility
Storm Setup:
One of the best parts about this tent is it’s versatile setup using trekking poles.
In storms you can pitch the tent low to keep it from blowing around as much in the wind and rain. This also allows you to keep the edges of the tent within an inch of the ground which reduces air flow and gives you more wind and rain protection inside the tent.
The “bathtub” floor extends 6” above the ground on all sides and gives you full waterproof protection from ground water, runoff and wind.
Even when it’s pitched low I can fully situp in the middle of the tent. I’m 6’2” tall.
Fair Weather Setup:
When the weather is nice and you want to improve airflow and living space the tent can be pitched higher leaving the edges of the tent 4-6” off the ground.
This provides much better airflow, reduces condensation and provides a large amount of headroom inside the tent.
Tight Space Setup:
One of the other great parts about this tent is you can fit it in very small spaces.
This often happens when I’m camping high in the mountains and there is only enough space to lay flat in 1 very small area.
Most cheaper / normal tents have a very large ground surface area that is enforced by the tent poles.
Tent – My Gear Checklist
Zpacks Offset Duo
8 – Groundhog Mini Stakes.
Shami to dry off tent – Also used as hiking towel.
I don’t use a ground sheet for the tent.
Tent Requirements:
Snow Tent
Used anytime I’m camping in snow greater than 6” that can’t be cleared to the ground. (Total weight)
Pros: Holds up to heavy snowfall
Easy to pitch on deep snow
Cons: Heaviest setup.
In the following section I’ll cover the reasons to use each setup, weights, and best ways to use.
Snow Tent
If you’re 6’ tall or less you could use this tent for the 3 season tent as well. It’s slightly shorter than the tent above, but it’s the only tent Z-Packs makes that has free standing tent poles.
I’m 6’2” so I opt to only use this tent when there is snow and the free standing poles are required.
This tent is required when you can’t clear the snow to the ground and need it to stand freely without as much ground purchase from the tent stakes.
My Snow Tent Setup: *add weights
Zpacks Duplex
Zpacks Free Standing Tent Poles
8 Ground Hog Regular Stakes
Shami to dry off tent – Also used as hiking towel.
When setting up the tent the tent stakes can be setup in “deadman” position.
Instead of installing the stakes in the snow like you usually would in the ground, dig a horizontal 8” long and 8” deep slot in the snow where each tent stake will go.
Slide the tent stake horizontally with the tent loop at the center of each stake.
Next put the stake horizontally at the bottom of each slot dug in the snow.
Now the stake can be covered up with snow and then compressed with your foot to hold the stake in the snow.
Step 3: Sleeping Pads
There are only three things that matter for ultralight sleeping pads.
- Comfort
- Insulation (R-Value)
- Weight
The ideal ratio between comfort, insulation is weight will always be inflatable sleeping pads.
You can sacrifice comfort for a lighter weight sleeping pad by buying an undersized inflatable sleeping pad or a bulky and lighter foam sleeping pad.
Sacrificing comfort reduces sleep quality and recovery leading to fatigue on the trail.
It’s just not worth it to save a few extra ounces aka a gulp of water.
You can also sacrifice comfort for less insulation leaving you cold at night, which reduces sleep and recovery while increasing calorie burn, requiring more food on the trail, increasing weight.
The ideal tradeoff between comfort, insulation and weight is a correctly sized inflatable sleeping pad.
In the following sections I’ll cover a breakdown of each of the three targets.
Comfort
Some ultralight hikers buy short sleeping pads where their legs and feet hang off the end of the pad.
While saving 2-3 ounces I find this setup to reduce sleep quality and impede recovery while on the trail.
Buy a pad with a length that allows your heels and head to extend to the very end of the pad without overhang.
This also keeps your body temputure up reducing calorie burn and improving recovery during rest.
The width of the pad also matters.
I’ve used 20” wide pads in the past where my arms hang off the edges requiring me to keep them folded over my chest at night.
This ends up sacrificing sleep quality and increases heat loss off the edges of the pad.
I use and recommend a 25” wide sleeping pad.
Foam sleeping pads are not comfortable to sleep on.
One of the main benefits of an inflatable sleeping pad is you can blow it up with more or less air to increase or reduce the firmness and insulation.
Adding more air to the pad makes it firmer but also increases it’s R-Value since you’re adding additional thickness between your body and the ground.
I like to sleep on a firm pad, so it’s always blown up to max capacity.
If you don’t like sleeping on a firm pad you can air it down to your preference.
If you start to get cold you can increase the air pressure to the desired warmth.
Insulation
R-Value is used to rate a pads insulation.
The higher the R-Value the more insulation the pad provides.
All inflatable pads have a higher R-Value than non-inflatable foam pads.
I prefer to use two different inflatable sleeping pads:
3 Season Pad – Medium R-Value
Winter Pad – High R-Value
The goal is to achieve the highest R-Value per unit of weight.
You can also do this by increasing or decreasing the air pressure inside the pad as noted above.
Different materials and insulation technologies can help you to improve the R-Value/Weigh Ratio.
The brands I use are covered at the bottom of this page.
Weight
Inflatable pads have the highest R-Value to weight ratio, making them ideal for ultralight hiking in all conditions.
The foam pads are lighter but they are also bulkier requiring you to pack them on the outside of your pack.
Inflatable sleeping pads are much smaller allowing you to pack them inside your pack keeping them dry during bad weather.
The other downside of foam pads is they will soak up water if they get wet.
When foam pads get wet they also don’t provide as much insulation, reducing the R-Value.
When you’re hiking in rain, they get wet and even heavier.
The only upside of foam pads is they do not get punctures.
This single upside is not worth all of the downsides noted above.
I’ll cover how to insure you don’t get punctures in an inflatable pad below, and a simple repair kit that ensures you don’t have problems if you do get a puncture.
My Sleeping Pad Setup
Thermarest Xlite (R-Value?) for lowest Temps Above 40 Degrees
Thermarest XTherm (R-Value?) for lowest temps below 40 degrees.
2 mil thick Trash Compactor Bag for ground sheet which is also used as a pack liner to protection against wet conditions.
Repair Kit(Covered below)
Reasoning behind Selections:
Most people wouldn’t use a high R-Value winter pad until the temps dropped into the 20s.
Through tested I’ve found that the 3 extra ounces or the Xtherm pad provides much more warmth than 3 extra ounces or extra layers in the form of down or wool.
By using the XTherm when the temps drop below 40 at night I reduce my pack weight by not having to carry a warmer sleeping bag/quilt or extra layers.
You’ll have to test this out on your own and dial in the real layering system.
How to Reduce Punctures:I’ve only gotten 1 puncture in my sleeping pad and it was my fault for not doing the following.
Number 1: When you get to your camp, find the ideal flat spot to lay your pad down.
Lay on the ground to ensure the foot is actually flat.
Use your foot / hands to clear off the area making sure there are no sharp rocks, pine needles, or other objects that might puncture your pad.
Setup your tent.
Inside the tent, lay down the trash compactor bag where your pad will go. The trash compactor bag is 2 mil thick on each side, giving you 4 mil thick ground protection.
This trash compactor bag is also used inside your pack as a pack liner while hiking during the day. This keeps gear dry in all conditions.
Place your sleeping pad over the trash compactor bag.
If you’re sleeping in the alpine and forced to sleep on sharper objects such as rocks, don’t fully inflate your sleeping pad. This will reduce the chance of puncture.
If you do get a puncture, the small patch inside the sleeping pad kit will not work in all situations since it’s very small. Throw it away and use this instead.
Step 4: Sleeping Quilts & Bags
Your quilt is the final layer of your sleep system, and its weight is directly tied to the insulation of your pad.
10 Degree Sleeping Quilt (950 Fill): Minimum temperature range 40 degrees to 0 degrees F. I layer down pants and coats at night for lower temp ranges.
30 Degree Quilt (950 Fill): Used for minimum temperature ranges above 40 degrees.
Layering for Weight Savings: When it is between 30–40 degrees, I use the quilt at camp as my primary insulation instead of bringing extra heavy clothing layers.
Pro Tip: Always carry earplugs. On stormy or windy nights, it can be very hard to sleep; these are essential to always have in your kit to ensure you get the recovery you need for the next day.
Repair Kit & Technique for Pads & Tents
Cover for tent too!
2-3 Feet of Tyvek Tape
Alcohol prep pad (dual use for first aid kit)
Shaving of Soap (dual use for first aid kit)
I’ve only gotten 1 puncture in a pad and it was a slide from a large rock I didn’t clear off the ground.
The patch that came with the pad would not have covered the puncture.
Instead, backroll a few feet of Tyvek tape to keep in a repair kit.
If you can easily find the leak by feeling it with your hands or face mark it for repair.
I keep a small shaving of soap in a little pill bag if I can’t find the leak.
In this case, make a slurry of soap and water and slowly work your way down the pad, applying it to small areas at a time until you see bubbles.
Mark or remember this area for repair.
After marking, use fresh water and clean off the pad as much as possible and let dry.
After drying, clean and area extending 1-2” extended in all directions around the damage, with Alcohol prep pad.
Allow to dry. Use heat from your feet with socks on them to keep area clean if required.
Deflate the pad only after drying.
Apply Tyvek tape to the entire area extending 1-2” around damage.
It helps to cut the ends of the tape with a small radius to remove 90 degree angles that will eventually peel.
I found Tyvek tape as a recommendation to repair pack rafts in the field. Once applied correctly it’s nearly indestructible, waterproof and puncture proof.
Squeeze out any air bubbles.
Onee applied Rub tyvek tape with a sock over your hand to create friction to ensure that the tape sticks. Do this for a few minutes until the tape really sticks.
Sit on the repair with your butt for 10-15 minutes allowing your body weight and heat to ensure the repair will last forever.
Reinflate the pad and test to make sure there aren’t any other punctures. Repeat if required.
If done correctly the repaired area is now more durable than your pad.
Another thing to keep in mind. The only time I got a puncture is when my pad was old. I had used it for 300 nights on the trail and it was thinning and losing material strength.
If your pad is worn out, it’s better to replace it. Old pads also lose R-Value.
How to 10X Your Learning Speed
The fastest way to master landscape photography is by learning firsthand from someone who has spent over a decade optimizing these skills through trial and error.
Blogs and videos are great for theory, but they cannot replace real-time, field-based instruction.
I offer high-intensity workshops and tours designed for all skill and fitness levels.
In a single 3-day session, I can teach you my entire system—start to finish.
You will receive 1-on-1 feedback in the field that will improve your skills faster than years of self-teaching ever could.
My students often learn more in three days than they have in the previous 20 years on their own.
Stop guessing and start creating portfolio-grade images.